|
Our goal here is not to teach fixed rules to take pictures, but
to share with you our knowledge based on our own experiments.
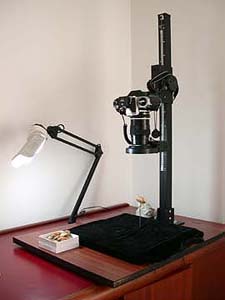
First of all, you need to choose the correct place to properly
set your equipment : enough natural light and a steady table will
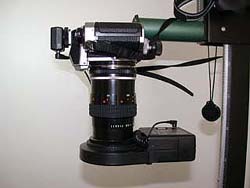
help you to take nice photos. Set the camera on a tripod or enlarger
table and make sure it is firmly attached. Try to put it at a
level that is comfortable for you to work at to avoid the need
of a chiropractic later... Artificial light can be used for digital
cameras so their auto focus will work in case only low light is
available.
A ring flash is always the best choice. It is the easier way
to get a quick and uniform light. Another trick is to use a piece
of white paper or aluminum foil to reflect natural light to eliminate
or reduce shadows. Just be careful to not redirect the light to
the lenses or the auto focus won't work (and it can be very annoying).
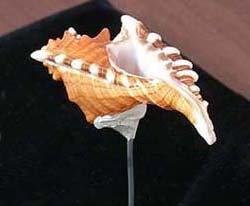
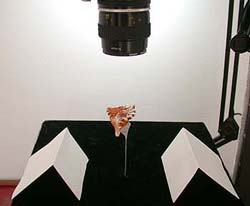
Make a pin to elevate the shell from the background, using a
metal wire or similar material. This method will blur the background
and reduce the shadow. Stick the pin into a piece of wood so it
is steady enough to hold heavier shells. Use putty to hold the
shell on the top of the pin (you can buy this material in office
supply stores).
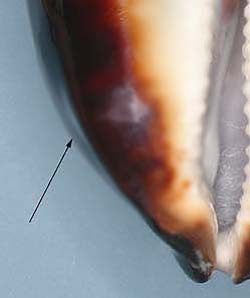
One of most common mistakes is to put the shell directly on the
background, making a hard shadow. If you keep this background
on your picture the final result will be very bad. Many will suggest
a background in a completely different color from the shell. See
the photo above where we used a blue background to take a picture
of a Cypraea. Shiny shells always produce a reflection of the
background, which is very difficult to remove even digitally.
So try to use a dark black velvet to make sure nothing will show.
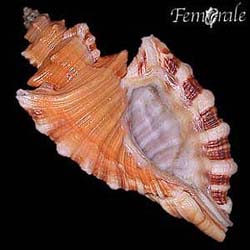
On darker shells you can use a white piece of paper and later
treat the photo on a photo editor.
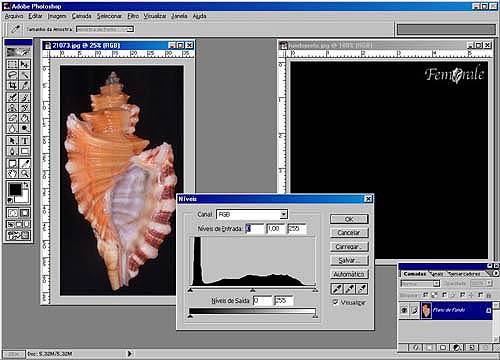
If you are going to send the picture only to a friend then there
is not much work to be done. However, if you wish to use it on
a website or print it, then you need to work using a good photo
editor. We use Photoshop®, but there are many good brands
on the market. In most cases you will have to "cut"
along the border of the shell to clean the background, and to
adjust sizes and position on the final photo. Also, you may find
it necessary to adjust levels and colors. Remember, the less you
adjust, the better the photo will be. Even if you know how to
make an awful picture into a reasonable one, try to make the original
as good as possible to avoid excessive work. The better you click,
the less work you will have: only imagine the time it would take
if we had to work for several minutes on each of our pictures,
since we take more than 200 pictures every week for our website
and list!
Apart from all the work you may have, the colors will vary from
computer to computer. Our computers have the Gamma adjusted so
we can create pictures as close to real as possible. But all this
work won't do any good if someone opens our photos in an old computer
using an old monitor...
 |
Another tips for digital shots:
Adjust the size of the original picture on the camera. If you
have a CD recorder and wish to keep good originals, then adjust
the camera on the higher definition or close to it. If you are
going to work with a large file, remember you will need a good
computer with large memory and good processor. Make a standard
background to use in all photos, and save it using an original
name like... background.jpg.
Try first using a black background. After you learn enough about
using your photo editor, you can experiment with different colors.
Save each file using an easily remembered name - we use our ID
number so we can find the originals very easily. Create your own
code: use the shell name or the number on your collection Try
to make your final picture smaller than 500x500 pixels - if you
make it bigger, some people will have a hard time viewing it.
(Besides, the file size will increase considerably.)
If the original is too dark or too ugly, take another picture
- after all you are not paying for the Photo lab...
Try to learn a little bit about how to work with your photo editor
- you can do a great job with it. Also you can have a lot of fun!
English revised by Lynn Scheu
|